Start with a composition that leaves room for the move
Use one clear focal subject, visible edges, and enough margin for the intended crop. A shadow or background seam makes it easier to tell whether the scene gains depth or simply slides as a flat image. Keep the source frame identical across your first tests.
Match the move to the shot
Push in when a label or surface texture needs attention. Use a slide when the relative movement of the subject and background matters. Use a small orbit for an angle change and look closely at the newly visible side, which the model has to infer.
Give the camera one job
Separate camera motion from subject motion in the prompt. Specify direction, pace, and where the shot ends. For a product shot, keep the object stationary and reserve the test for the camera move.
Check parallax and edges before exporting
Watch the product edge against a background line in the middle of the shot. Foreground and background should shift in a plausible way. Look for waving rims, expanding labels, or a product that rotates on its base when you asked for camera motion.
How to put it into practice
- Upload a still with a clean outline and the desired opening angle.
- Copy one prompt and match its framing details to your image. Keep the same model and settings when comparing moves.
- Review the opening, midpoint, and closing position and select a usable take.
GenVid generation test
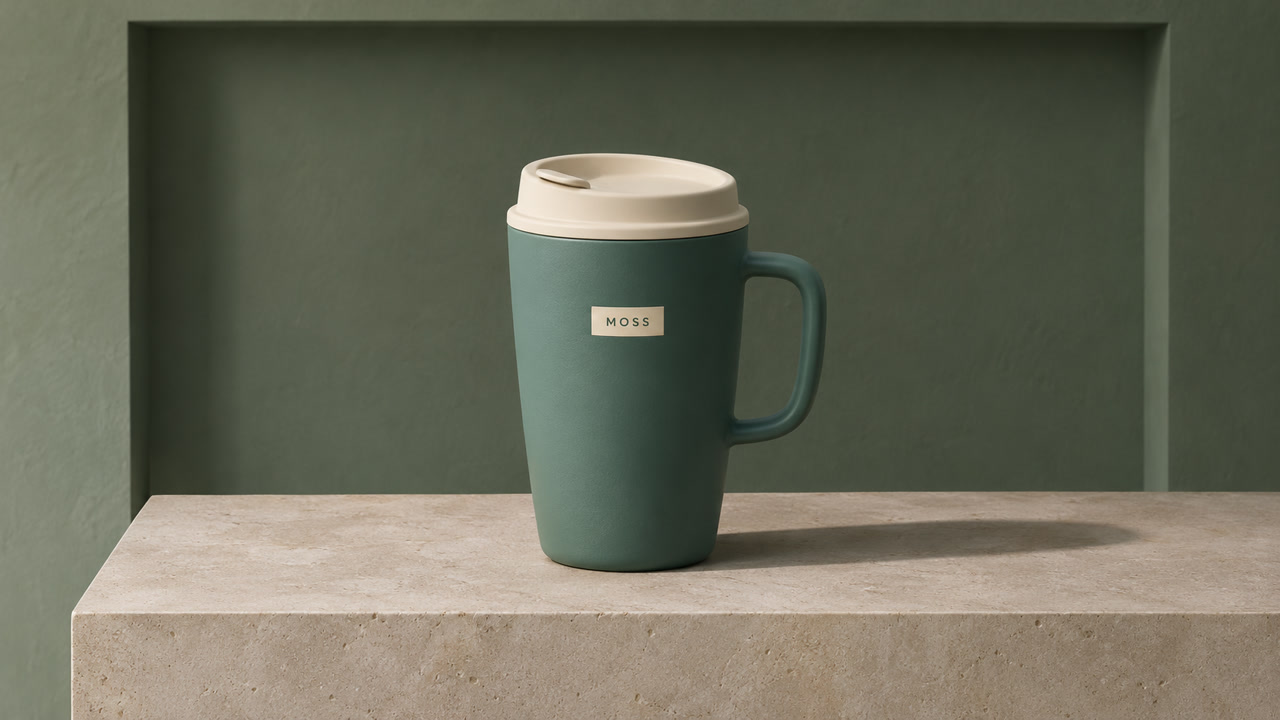
Wan 3.0, 4 seconds, 16:9, 720p requested. Each example is a single run using the GenVid model integration. Web previews are resized and silent. All three runs used the same first frame.
Three briefs to copy and adapt
Each brief describes an intended result and what to check during review.
Slow push-in
From the supplied first frame, move the camera slowly forward toward the teal mug on the stone plinth. Keep the mug stationary with the cream lid and MOSS label centered. Keep the lighting steady. End on a closer view with the entire label visible.
Choose a starting frame with spare crop room. The mug should get larger while its edges and proportions stay coherent.
Lateral slide
Slide the camera steadily to the right at the same height. Keep the teal mug and stone plinth stationary and hold the framing wide enough to show the lid. Let the background panel and the mug shift against each other with subtle parallax. Use steady lighting.
Use a background edge to see the depth shift. Check that the mug does not slide on the plinth.
Small orbit
Make a small clockwise camera arc around the stationary teal mug, beginning at the supplied three-quarter view. Keep the same camera height, subject scale, and soft side light. Keep the cream lid and single MOSS label stable as the visible side changes slightly.
Start from a three-quarter view. Inspect newly visible geometry and compare the lid profile with the first frame.
Compare your options
| Option | Useful for | What to check |
|---|---|---|
| Image-to-video | Create movement from a single frame | Check direction and edge stability through the clip. |
| Change Angle | Explore a different still perspective | Check details the new angle exposes. |
| AI Storyboard Generator | Plan several shots in sequence | Keep subject and setting continuity between frames. |
Frequently asked questions
What is the easiest move to try first?
Try a gentle push-in with the full subject visible and extra margin around important details.
What is the difference between a pan and a slide?
A pan pivots the camera from one position. A slide moves the camera sideways, shifting near and far objects relative to one another.
Can I request an exact orbit angle?
Use a modest angle as a visual direction. Inspect the output if precise camera geometry is important.
Why does the label change during an orbit?
New viewpoints expose details that the model may infer. Request a smaller move or start with a source that shows more of the relevant side.
Can I combine camera moves?
Test each move separately first. Once each clip works, decide whether to combine the instructions or join two clips in an edit.
Sources
Product and model names belong to their respective owners. GenVid is an independent platform.